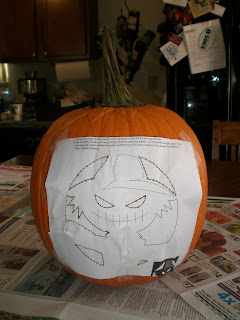
I usually don't have any creativity when it comes to making faces, so I went to the internet. I searched for pumpkin carving patterns and up popped BHG.com. After taking a short quiz, it directed me to some stencils I might like. Find them here. The one I chose is located under Seasonal Fall Pumpkin Stencils. I wanted one that wasn't too hard, but wasn't super corny either, so I went for a scarecrow. After the stencil was printed and newspaper was laid, it was time to get to cutting, scooping, carving, and roasting.
the tools
Alex was kind enough to cut off the top for me. I saved all the carving tools from a kit I purchased a couple years ago. This kit included a fancy scooper to get all the insides out. I kind of actually like how the insides feel, which is really gross and weird. But, I still like how it feels between my fingers. I scraped the inside clean and put the guts in a bowl to collect the seeds. Once gut-free, I taped the stencil to the outside and got carving. For the parts to be hollowed out, I outlined what I was going to cut by using the poker. For the shaded parts, I used the roller. These were a great outline for when the stencil was taken off.
the stenciled pumpkin
geez hallie! clean that mess up.
Once off, I used the smaller carver to cut through the areas to be hollowed out. I used the large carver to finish the spots that I couldn't get all the way off with the smaller carver. For the shaded areas, I used the smaller carver to give me a start. Then I took the scraper (kind of looks like a hook), and started to shade away. It was important not to dig too deep so not to take off the whole piece. Overall, it only took me an 1 1/2 hours from start to finish. And I'm so happy with how it turned out!!
oooooooh...scary
dang, I'm good :)
Happy Carving!
--Am
Oh and of course you have to roast the seeds...YUM!
Oh and of course you have to roast the seeds...YUM!


No comments:
Post a Comment